List your service
Your service earns from x402 payments whether or not it's listed — the catalog is a discovery layer, not a gate. Listing it makes it findable by humans in the catalog and by AI agents through the Explorer's MCP server.
There are two ways in:
| How it happens | What you get | |
|---|---|---|
| Auto-indexed | Your service's first settled payment puts it in the catalog by itself — nothing to do | A listing marked Auto-indexed, ownership not proven |
| Registered | You sign in, check your endpoints, and register them in one signed batch (below) | A listing with name, tags, links, and an optional on-chain identity |
Listing and ownership are separate questions. Registering puts a service in the catalog; verifying ownership — proving you hold the address the service is paid at — is its own one-time signature. It happens automatically when you register with the payout wallet, and can be done any time later if you didn't (or if the service was indexed from a payment). Only the verified owner can edit a listing, withdraw it, or mint its identity.
Either way, the Explorer never holds your funds. Buyers pay your payTo address directly on
chain; listing only publishes metadata.
The seller screens below were captured against a local test instance with a demo wallet, so the service names and addresses are examples. Your own page looks the same with your data.
Step 1 — Sign in with your payout wallet
Open My services (the Manage section of the left nav) and click Sign in.
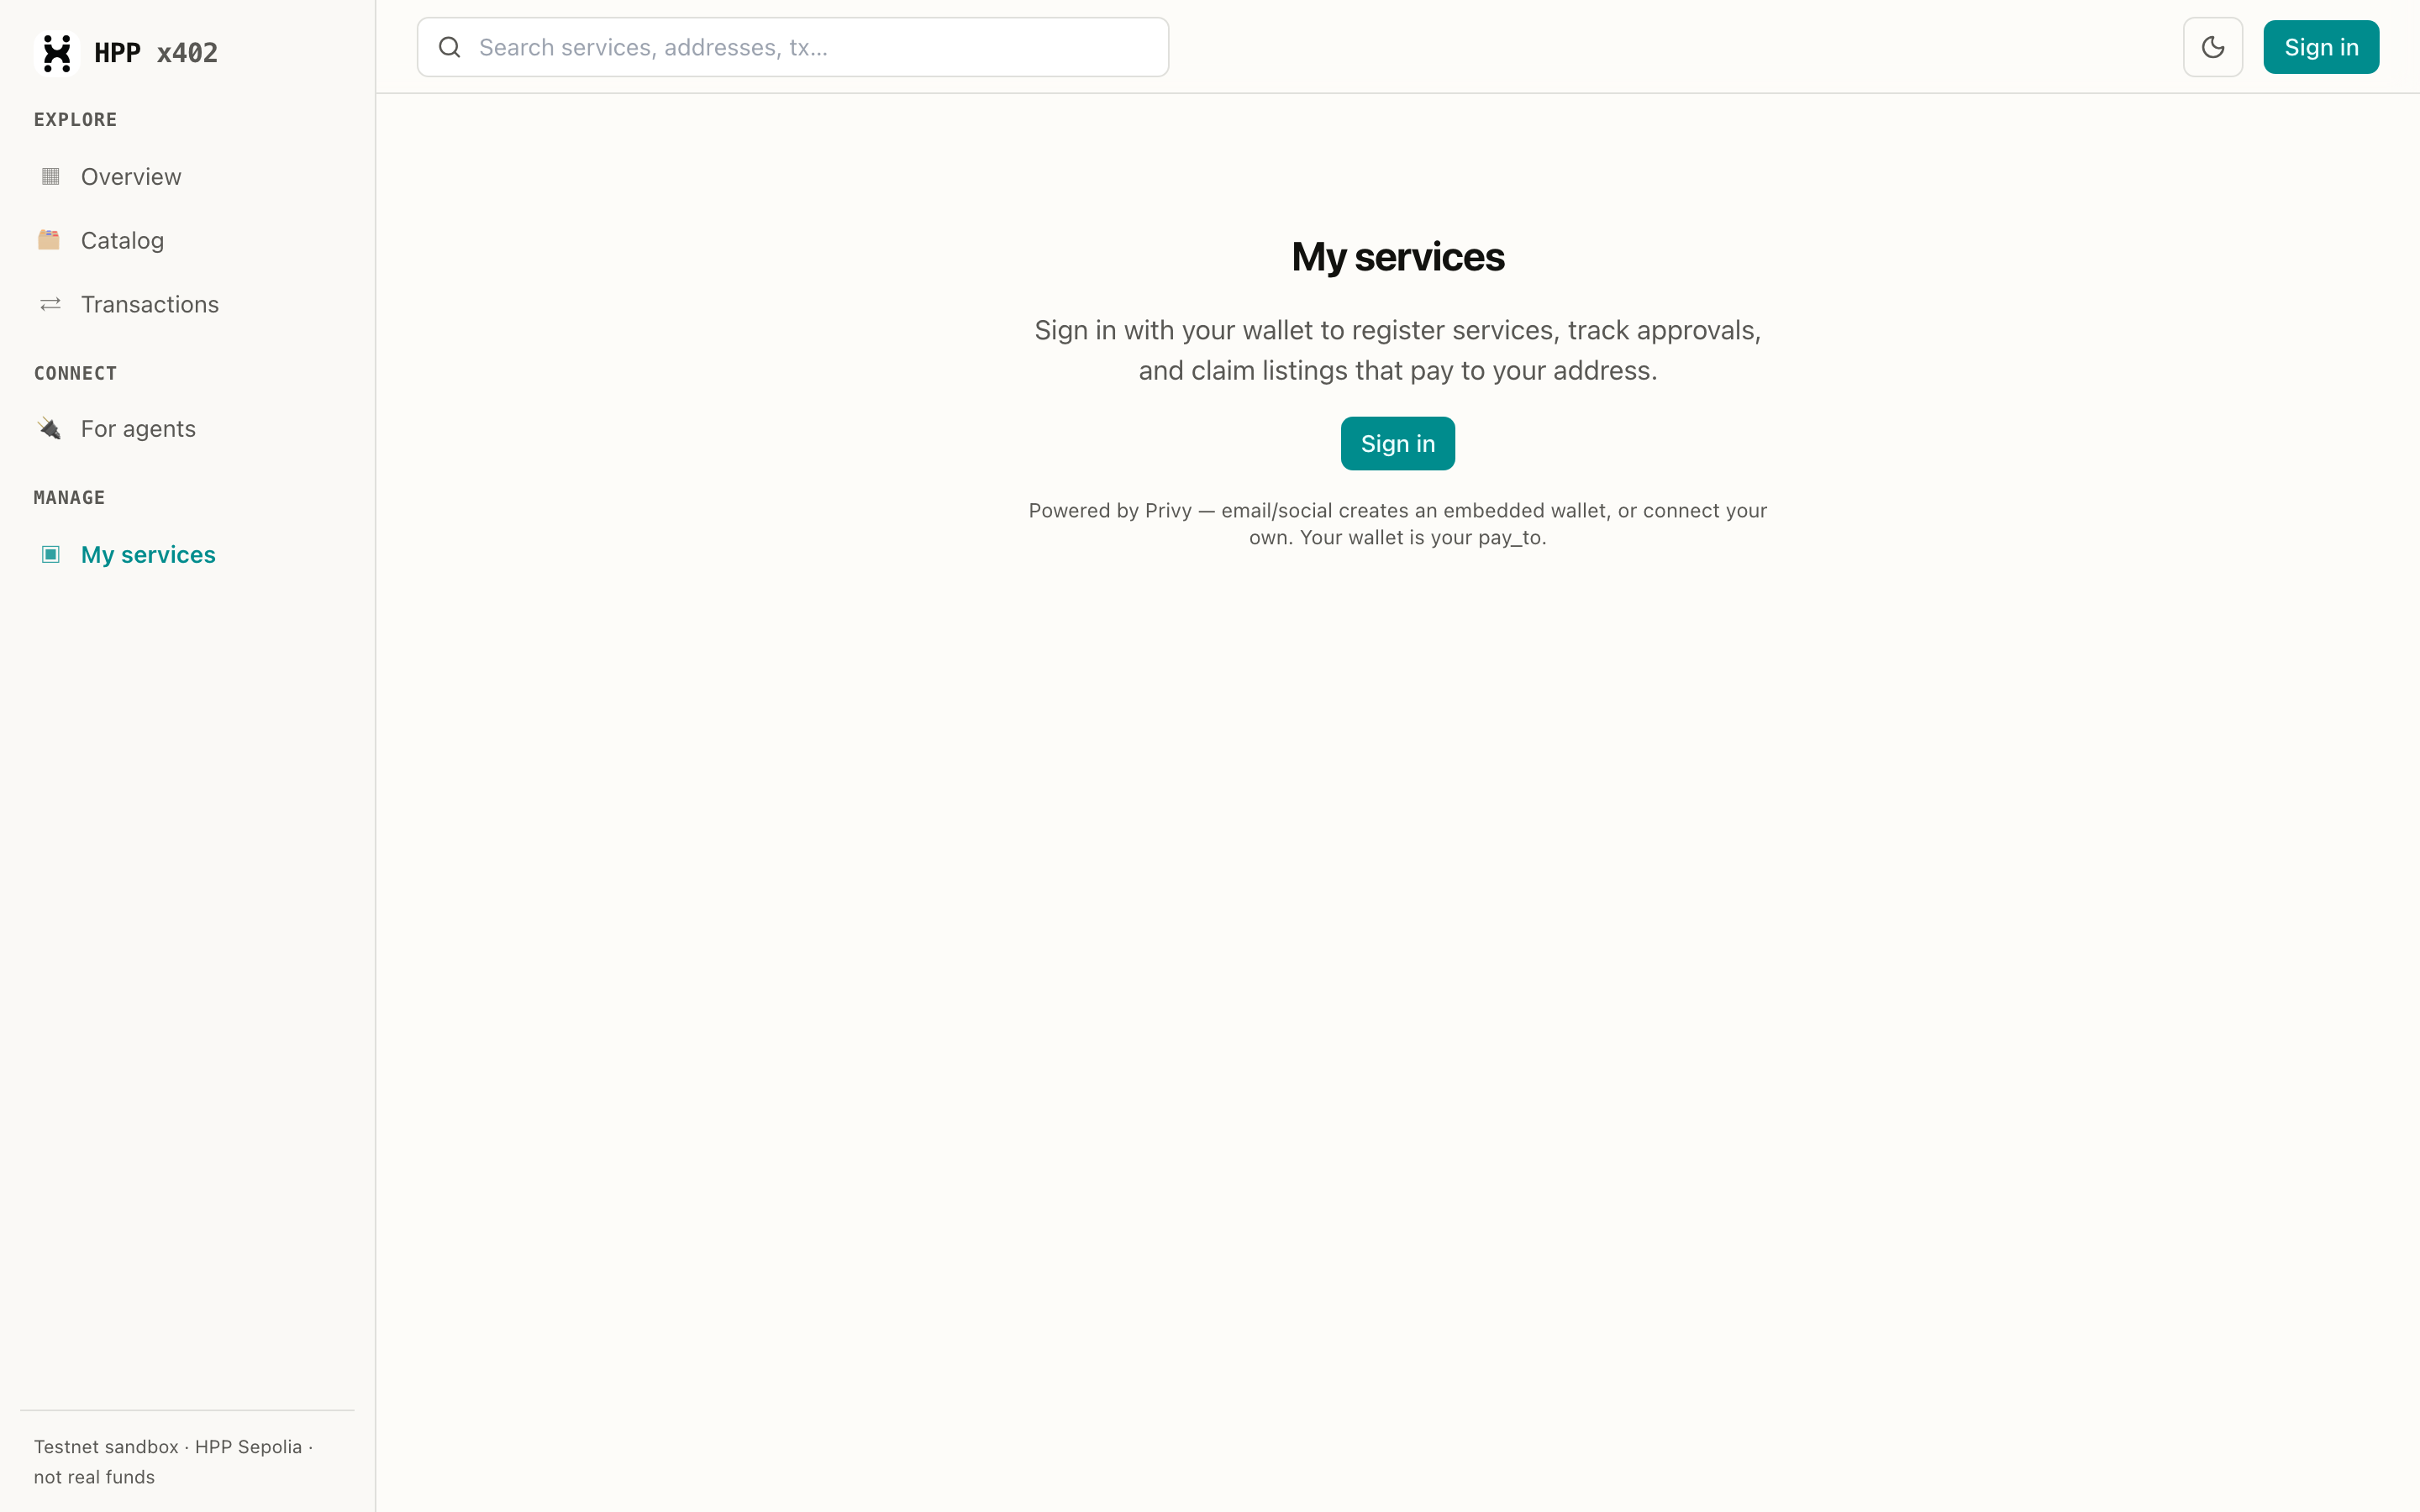
Sign-in is powered by Privy: use email or a social login and Privy creates an embedded wallet, or connect a wallet you already have.
Your wallet address is your identity here — the Explorer matches listings by their payTo
address. Sign in with the wallet your endpoint's 402 pays to, or you'll see an empty page.
Step 2 — Verify ownership of what already pays you
If your service has been paid before — or someone registered it on your behalf — it's probably
already in the catalog. My services lists every service whose 402 pays your wallet but
whose ownership is not yet proven, each with a Verify ownership button.
Click it and sign the message your wallet pops up. The statement covers every endpoint of the
service in one signature (Prove ownership of 2 service endpoints), so an HTTP route and its
MCP twin are proven together. The listing gets the Verified badge and unlocks management:
editing, withdrawing, minting an identity.
Signing proves you control the payout address — nothing more. It's a plain EIP-712 signature — no transaction, no gas, and it does not move funds or change the price or where the money goes.
Step 3 — Register a service
To list something new (or something that has never been paid for yet), click + Register a service. Fill in the service once, then add its endpoints:
About the service
| Field | Notes |
|---|---|
| Service name | What buyers see in the catalog, e.g. Weather Oracle |
| Icon URL | Optional; a square image looks best |
| Tags | Comma-separated keywords — they feed search |
| Homepage / Docs / Source repo | Optional links shown on your service page |
Endpoints (resource URLs)
One row per callable thing. A service that speaks both HTTP and MCP has two endpoints — click + Add endpoint for each.
| Field | Notes |
|---|---|
| Type | http, mcp, or a2a — publish HTTP as the canonical one, and add an MCP twin if agents are your buyers |
| Method | HTTP verb (http only) |
| Resource URL | The exact paid URL, e.g. https://weather.example/paid/forecast |
| Description | One line describing what the endpoint does — this is what semantic search matches on |
| Payment options | Network, token, scheme (exact / upto), and price. Use + Add option if you accept more than one network or scheme |
If your service publishes an OpenAPI document, ⤓ Import from document reads it and pre-fills the endpoints it charges for — you can still edit the rows by hand.
Check, then sign once
Click Check endpoints. The Explorer calls each endpoint once without paying and shows you,
per endpoint, what a buyer would see: the live payment terms (price, scheme, network), the
address the 402 pays, and — if the endpoint refused the request — the endpoint's own error
text.
Some endpoints validate input before charging, so an empty probe never reaches the 402. In
that case paste a sample request (the JSON body a real call would send) and Check again.
The sample is stored with the listing, so later re-checks work without you.
When every endpoint you care about checks out, click Sign once & register all — one
signature covers the whole batch, and your wallet shows exactly what it approves
(Register 2 service endpoints). Results come back per endpoint; partial success is normal.
If you edit the list after checking, the Explorer asks you to check again before signing.
A buyer can't inspect what they haven't paid for, so whatever your 402 advertises is all they get.
If you publish an MCP twin, declare its arguments there too — an MCP tool whose inputSchema is
just args: object tells a buyer nothing, and they end up guessing with real money. Don't assume the
HTTP example carries over: the same service often takes {"text": …} over HTTP and
{"args": {"text": …}} over MCP.
402 is the source of truthPrice, scheme, network, payment metadata — and the payout address — are taken from the live
402 your endpoint returns at check time, so a listing can't advertise terms your service
doesn't actually charge. Have your endpoint live and returning a 402 before registering; if
the probe can't reach it, the listing is still created from what you typed, and the real terms
fill in on the first settlement.
The endpoint's 402 is the authority on where the money goes. If you sign the registration
with that same wallet, the listing is verified on the spot. If you sign with a different
wallet, the listing is still created — unverified: it can appear in the catalog and earn,
but only the payee can edit it, withdraw it, or mint its identity, by proving ownership later
(Step 2). Overwriting an existing listing
is gated on the wallet that registered it, and if an endpoint's payout address changes, its
verification is cleared.
New registrations enter pending review; an operator approves them before they show up in the public catalog. You'll see them in your own table the whole time.
Step 4 — Manage your listings
My services is your dashboard from then on:
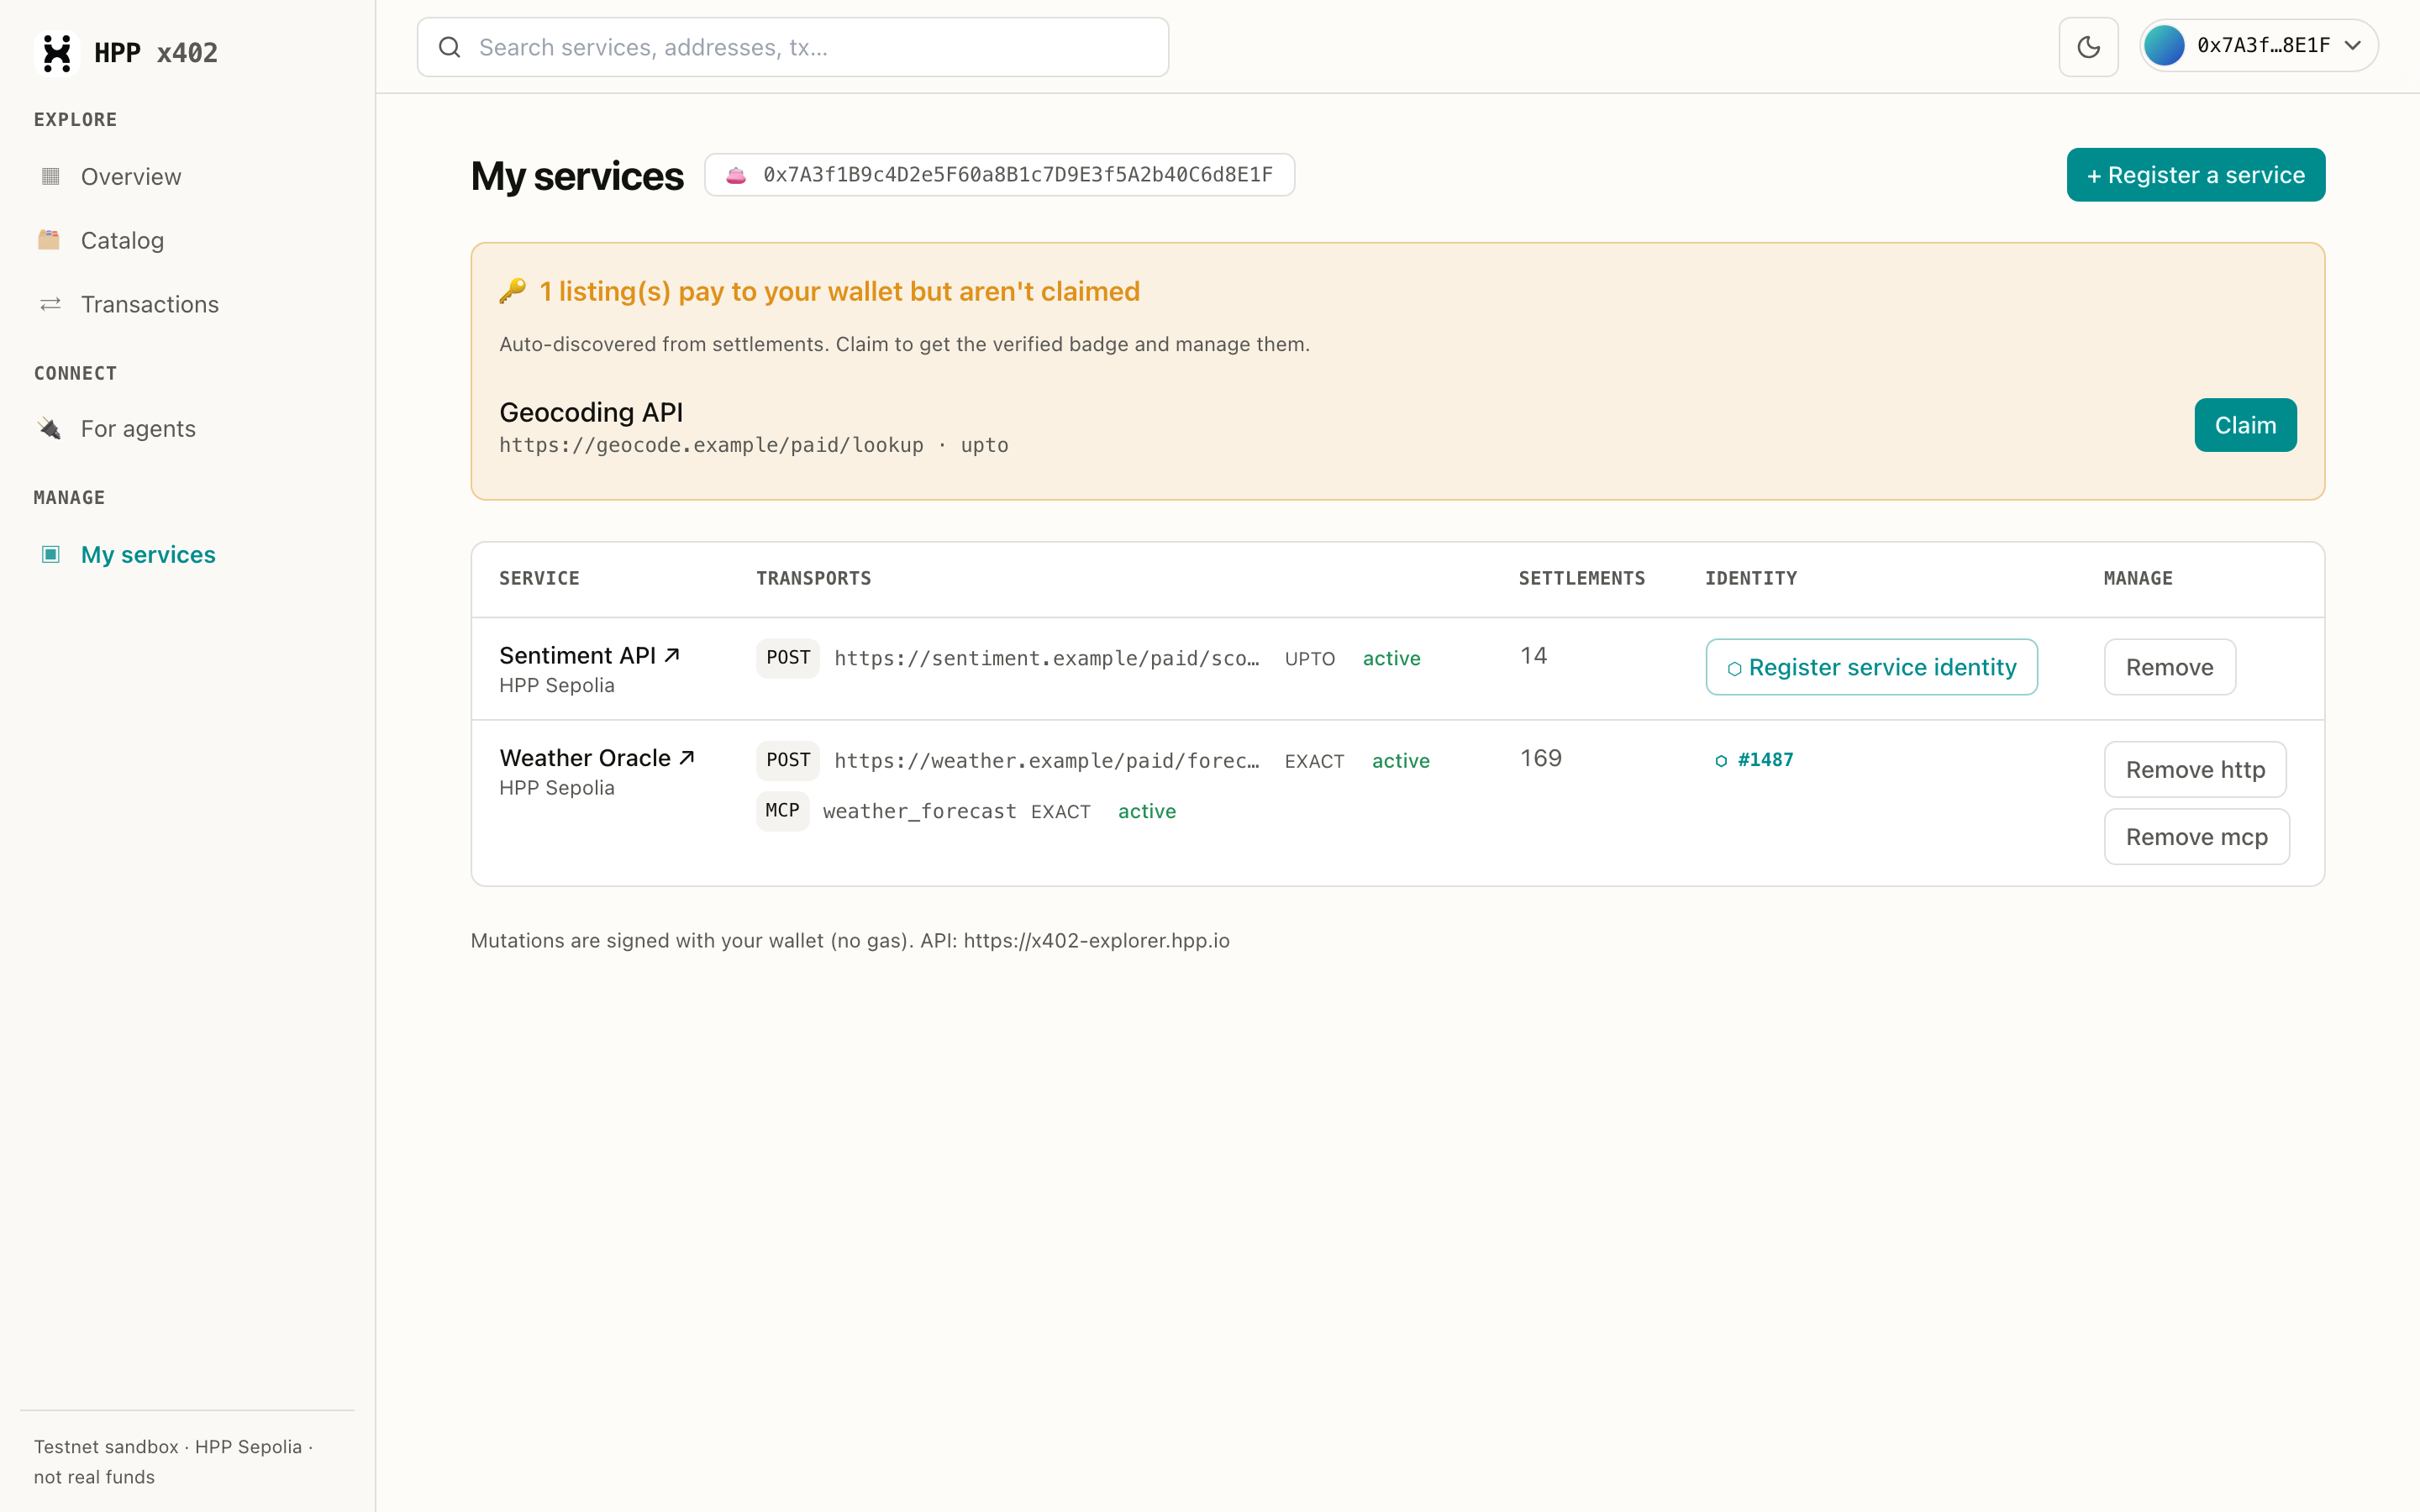
| Column | What it tells you |
|---|---|
| Service | Your service and its network — the ↗ opens its public page |
| Transports | Every endpoint of the service, its scheme, and its state (active, pending, withdrawn) |
| Settlements | On-chain payments counted across the whole service |
| Identity | Its ERC-8004 identity — an agent number, or a button to mint one (verified owners only) |
| Manage | Delist a single transport, or relist one you withdrew — for services you've verified |
Removing a transport delists it from discovery — it stops appearing in the catalog. Your endpoint keeps working and your funds are untouched; you can list it again later with the same name and price, and it keeps its identity.
Step 5 (optional) — Mint an on-chain identity
Once a service's ownership is verified, click ⬡ Register service identity to mint an ERC-8004 identity for it. Gas is sponsored — it costs you nothing.
One identity covers every transport of the service, so your HTTP route and your MCP tool are one
agent rather than two. Once minted, the badge shows the agent number (e.g. ⬡ #1487), and your
service can be filtered by On-chain identity in the catalog — a stronger trust signal for buyers
and agents.
Related
- Quickstart: Sellers — the code side: charge for an endpoint with
the
@x402SDK. - Find a service — what buyers see when they land on your listing.
- Connect an agent — how agents discover and call what you listed.